
How to Make the Perfect Diaper Cake

Have you been invited to a baby shower and are thinking about a gift? Or are you the host of the shower and wondering how to make a diaper cake as the centerpiece for the dessert table? Either way, DIY baby shower diaper cakes not only look festive and fabulous but are also a great gift for the mom-to-be.
Read on for diaper cake ideas and instructions!
What Exactly Is a Diaper Cake?
A diaper cake is basically a DIY cake-shaped gift that’s made with diapers, often given to the mom-to-be at her baby shower, before she goes on maternity leave, or used as a centerpiece at a party either before or after the baby is born. No matter how or when you give the diaper cake to the expectant parents, they’ll be surprised and delighted—and you’ll have a pretty good time creating it, too!
How to Make a Diaper Cake: Supplies
There are endless diaper cake ideas—it can match the theme of the baby shower, or simply have more general decorations that evoke all things baby. Sometimes the diaper cake can reflect the mom’s personality or tastes; for example, giving it a modern look with succulents or greenery, or decorating it with the colours of her favourite sports team. If you’re tasked with planning a baby shower or simply want to make a diaper cake for an expectant mother, here’s a basic list of the things you’ll need:
What Diapers to Use for a Diaper Cake
We recommend Swaddlers, or Cruisers for all expectant mothers, or Pure Protection, for eco-friendly moms-to-be.
You can either use newborn diapers (0 to 3 months) or a mix with baby diapers (3 to 12 months) so that mom-to-be is stocked up. Using different sizes will also help to create each tier of the cake.
How to Make a Diaper Cake: Step-by-Step Instructions
Making a diaper cake takes patience, but it can also be a lot of fun. Plus, it’s a great opportunity to get your creative juices flowing. Follow these five simple steps, and before you know it, you’ll have the finished product ready to go.
Step 1: Choose a Base
A sturdy base is crucial, especially if you’ll transport your diaper cake. You could use a piece of firm cardboard, a cake stand, or a large tray. If you choose cardboard, you can cover it in foil or wrapping paper, or cut it into a circle that’s the exact same size as the bottom tier of the cake.

Step 2: Prepare the Diapers
There are two main methods for making a diaper cake: the roll-up and the wrap methods. For a roll-up diaper cake, roll up each individual diaper and secure it with a small rubber band so that it can’t unfurl. You can also tie a ribbon around each, but this is more time consuming. Set each one aside until you’ve rolled them all up.

For a wrap diaper cake, there’s not much you need to do. Simply take the diapers out of the packaging and move on to step three.

Step 3: Position the Diapers
For a roll-up diaper cake, position the rolls vertically and close together until you’ve reached the size you want for the base tier. Secure the rolls in place with an extra-large rubber band or ribbon. If you’re using a rubber band, you can cover it with ribbon later on. To fasten the ribbon, you can either use a bit of hot glue (taking care not to get any on the diapers) or tie a small knot that you can hide under a decoration later on. Another option is to tie a big bow using the long ends of a ribbon.

If you’ll have a second tier, place about three wooden dowels between the diaper rolls so that your next layer of rolls are held firmly in place.

Create the second tier by placing more diaper rolls around the dowels. The second tier should be smaller than the first. Secure the second tier with an extra-large rubber band or ribbon just as you did with the first tier. If the dowels stick out, you’ll need to cut off the top tips (or use shorter dowels) so they don’t show.

Add as many tiers as you like (most cakes have two or three tiers), and then move on to step four. For a wraparound diaper cake, place a clean paper towel roll upright on your base and wrap the diapers around it. Keep wrapping until the first tier of your diaper cake is as wide as you want it to be. Once you’re done, secure the diapers in place with an extra-large rubber band or a ribbon. You can fasten the ribbon with hot glue (just take care not to get any on the diapers), or with a knot or bow. If you use a rubber band, you can cover it later on when you decorate your diaper cake.

Some people like to use a bottle of champagne instead of the paper towel roll as a surprise for the parents-to-be! Alternatively, you could also use a baby bottle, which then could become a part of your gift to the parents. It’s a delightful surprise either way, but a paper towel roll also works just as well. To add a second tier, keep wrapping diapers around the top half of the paper towel roll. It’s best if the second tier is smaller than the first tier, then secure it with a rubber band or ribbon. Add a smaller third tier in the same way or move on to step four.

Step 4: Add Decorations
You have lots of options when it comes to diaper cake decoration ideas! If you used a rubber band to keep your diaper rolls in place, you can cover it with ribbon or fabric. Then, you can add some small toys, placing them around the base or on each tier of the cake. Adding a feature toy, like a bigger teddy bear, to the top of the cake also works well. Other decorations you can add include fresh flowers, paper cutouts, signs written in calligraphy, or chocolates, just to name a few. You can match the baby shower’s theme or get creative and choose your own colour combination or theme. If you’re the baby shower host and haven’t settled on a theme yet, check out all our baby shower resources, which can help you plan a diaper cake for boys, a diaper cake for girls, or a gender neutral diaper cake!
Step 5: Wrap the Diaper Cake
If you’ll transport the cake, it’s a good idea to wrap it, which helps prevent it from coming apart or getting damaged. Place a large sheet (or two) of cellophane or soft tulle on the table and place the base of the diaper cake on top. Then pull the corners of the cellophane up above the cake, cinch it together, and secure the wrapping with ribbon.
25 Diaper Cake Decoration Ideas
There are lots of creative ways to decorate your DIY diaper cake. We’ve rounded up 25 great ideas to make your diaper cake beautiful and unique!
Use colourful ribbons. Ribbons help hold the diapers in place, but they also help tie the “look” of the diaper cake together. Popular colour schemes include:
Baby blue and white: great for diaper cakes for boys
Baby pink and white: great for diaper cakes for girls
Yellow and baby blue: a lovely gender-neutral option
Dark blue or black and silver: good for a sleek modern look
Gold: pairs well with many other colours but also works for a star-related theme
Purple: this suits a fairy or woodlands themed shower
Green and brown: great for a nature-inspired diaper cake
Red, blue, and yellow: classic children’s colours, which also work well for a superhero theme.
Use patterned ribbons or layer the ribbons. Go for patterned ribbons like polka dot or a ribbon that has a special trim. Another option is to place a wider ribbon on first, then layer a thinner ribbon of a different colour or texture on top. You can even get creative with other fabrics like lace or burlap.
Use twine. Give the diaper cake a more natural look by using twine instead of ribbon to secure the diapers in place. When paired with greenery or flowers, it can look really beautiful.
Cover each tier in fabric. For example, you could use buffalo check for a farm or country themed baby shower, or cover each tier in a baby swaddle as an additional gift for the mom-to-be.
Get creative with the base.
For a woodlands or nature-themed baby shower, you can use a clean slice of wood as the base.
If the colours of the shower are pink and gold, placing the diaper cake on a mirrored tray will reflect the colours beautifully, adding to the overall effect.
If you’re using cardboard as a base, cover it in wrapping paper that matches your diaper cake’s colour scheme.
Create or print paper cutouts. For a woodlands theme, you could add cutouts of fairies, toadstools, owls, or foxes to the side of your diaper cake. Or the cutouts can simply be “baby related.” For example, cutouts of bodysuits, baby bottles, and booties. You could use small, decorative pegs to attach the cutouts, or glue them to the ribbon, taking care not to get any glue on the diapers.
Add a bow and bow tie. If the baby shower has a “bows or bow ties” theme, add both to your diaper cake to reflect the theme.
Add tulle as the trim. If the theme is ballerina or princess, you can add white, pink, or purple tulle trim to the bottom of the diaper cake. The added benefit of this is that it hides the base and works well for diaper cakes for girls.
Say it with flowers. The mom-to-be definitely deserves flowers at such a special time! You may like to add some fresh (or fake) flowers to your diaper cake, or make flower bud shapes out of paper or other craft supplies like felt.
Hang a pennant banner. Your local party supply shop might have a smallish pennant banner that you can drape around one tier of the cake. You could also make your own by cutting triangles out of colourful card stock and attaching them with string or twine. Consider adding lettering to each triangle, perhaps spelling something out like “baby.”
Make a sign. Create a sign that says something like “Oh, baby!” or “Oh boy!” (if the gender has already been revealed), or something else that matches the baby shower theme. If you have a friend with calligraphy skills, this is the time to ask for help! You can use different colours of card stock, glitter, colourful pens, or anything else that works for your theme. Once your sign is finished, stick a toothpick on the bottom edge and place it between two diaper rolls so that it stays upright.
Place some small gifts around the base or on each tier. By placing a few small baby items, you can make your diaper cake look even more spectacular while also giving the parents-to-be some extra goodies. You could add
a teething ring
a bath toy
a baby bottle
a rolled-up bib or burp cloth
a baby bootie
socks
mittens
a small travel pack of wipes
a pacifier.
Place a soft toy on the top. Plop a plush animal toy on top of your diaper cake, such as an elephant, bunny, or teddy bear. If your diaper cake has a colour scheme (for example, pink) you may want the cuddly toy to match the colour, or you could also pick a contrasting colour. For example, if you have baby blue diaper cake decorations, place a dark brown teddy on top.
Add crinkled paper to each tier. This is a popular way to cover the diaper rolls of each tier. Buy shredded paper that matches the colour scheme or theme of your diaper cake and place handfuls on each tier.
Place a rubber duck on top. Nothing says “childhood” like a yellow rubber ducky bath toy! If it matches the rest of your DIY diaper cake, sit a toy duck on top. This idea is both cute and useable by the parents-to-be in the years to come.
Give it a modern spin with succulents or greenery. Not all diaper cakes have to be “baby” themed. For example, you could decorate your diaper cake with succulents, green branches, or native flowers. This can look particularly lovely when paired with twine or burlap.
Place baby booties on top. Nothing is more adorable than a pair of baby booties or shoes, and using a pair as the centerpiece of the cake is super cute.
Add a small helium balloon. Your local party supply store probably has quite a range of small helium balloons in different colours or with wording like “Oh, baby!” Tuck the fastener that comes with the helium balloon in between two diaper rolls to hold it in place.
Give it the unicorn treatment. Unicorns are always a lot of fun, so adding the horn, ears, and eyelashes to your diaper cake will definitely make party guests smile. You can use simple craft supplies like card stock and glitter to make your unicorn shapes, then use a toothpick to secure them in place between the rolled diapers.
Add sweet treats. It is a diaper cake after all, right? You can stick some candies, chocolates, or cookies on sticks between the diaper rolls. If you decide to go this route, you might want to add a sign that says something like “Sweet baby.”
Match the decorations to the season:
During summer, you might like to add sunflowers to your diaper cake or give it a bee theme.
In fall, think pumpkins or fall leaves.
In winter, consider making your diaper cake look like a snowman or use gray ribbon, silver glitter, and snowflake cutouts. A “Baby it’s cold outside” sign is the perfect topper for a winter diaper cake.
And in spring, think butterflies as decoration or go with a bunny theme.
Add a children’s book. If the baby shower has a “bring a book” theme, or you simply would like to include your favourite storybook, then add it to your diaper cake.
Wrap string lights around each tier. You can probably get a string of battery-operated lights from your local big box store or online. Gorgeous lighting can work really well if the theme is “twinkle, twinkle, little star” or “a star is born.” This will be a real showstopper!
If the mom-to-be is having multiples, up the fun! You might like to create two or three small diaper cakes or add multiple toys so that each baby gets her own soft toy.
Keep it small and simple. Diaper cakes don’t have to have multiple tiers and lots of decorations. For example, you might like to simply create a one tier diaper cake with one pack of diapers and decorate it with a lovely ribbon, adding a sign or a soft toy on top. Voila, all done!
The Bottom Line
There’s no right or wrong when it comes to how to make a diaper cake. Whether you go big or small, extravagant or understated, it’s the thought that counts, and your efforts will be appreciated. Have fun with it and watch as the guest of honour’s face lights up as you unveil your creation!
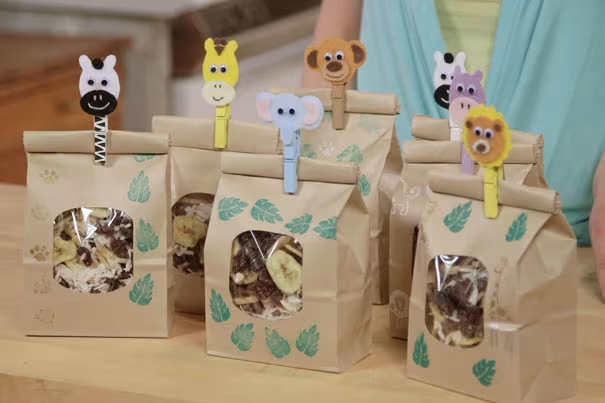
For even more baby shower ideas, check out our baby shower checklist and our list of 40 fun baby shower games to play. And to start the mom-to-be off on the right foot, she can download the Pampers Club app and redeem rewards for all the diapers on her diaper cake!
Read more about Pregnancy


Join Pampers Club and get:
- PAMPERS COUPONS
- TOOLS & QUIZZES
- PARENTING TIPS
 PAMPERS COUPONS
 TOOLS & QUIZZES
 PARENTING TIPS